Generative AI for Krita
Integrate AI into your digital painting and image editing workflows.
Download & Installation
1.Install Krita
2.Download the Plugin
3.Install the Plugin
Run Krita. Go to Tools ▸ Scripts ▸ Import Python Plugin from File...
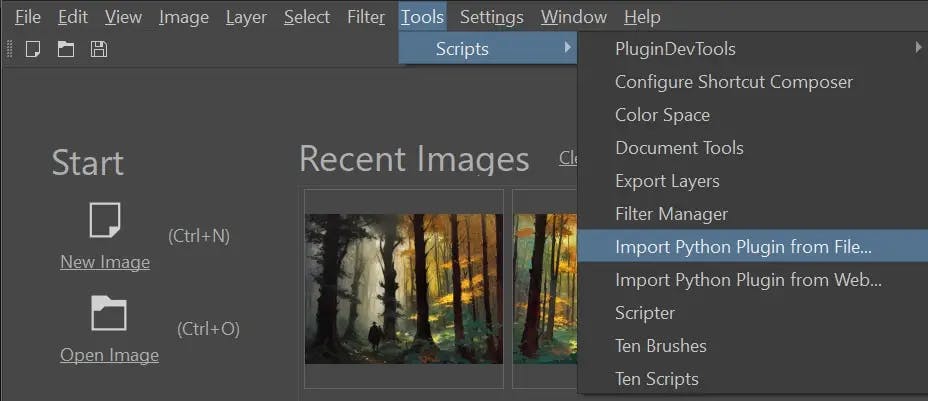
Select the ZIP file you just downloaded. When prompted to enable the Plugin, press Yes.
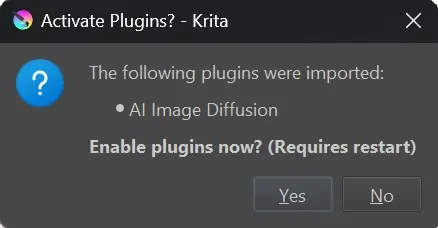
Now Krita needs to be restarted!
4.Enable the Docker
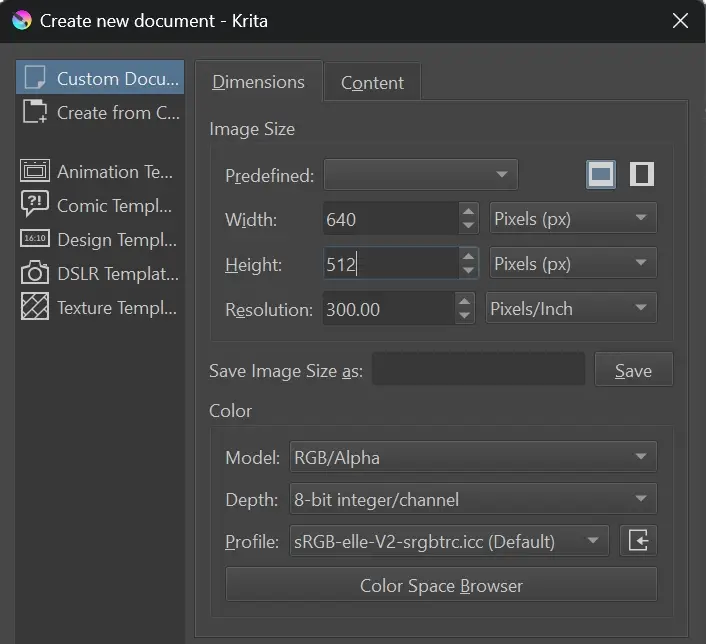
In Krita, create a new Document. For starters, choose a low resolution.
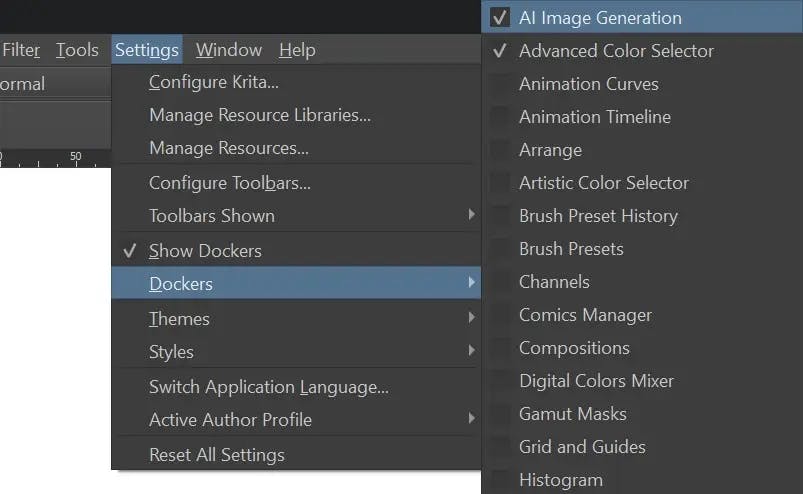
Enable the Plugin Docker from the Menu bar: Settings ▸ Dockers ▸ 🗹 AI Image Generation
5.Configure Image Generation
The Plugin is installed now and you should see the Docker appear.
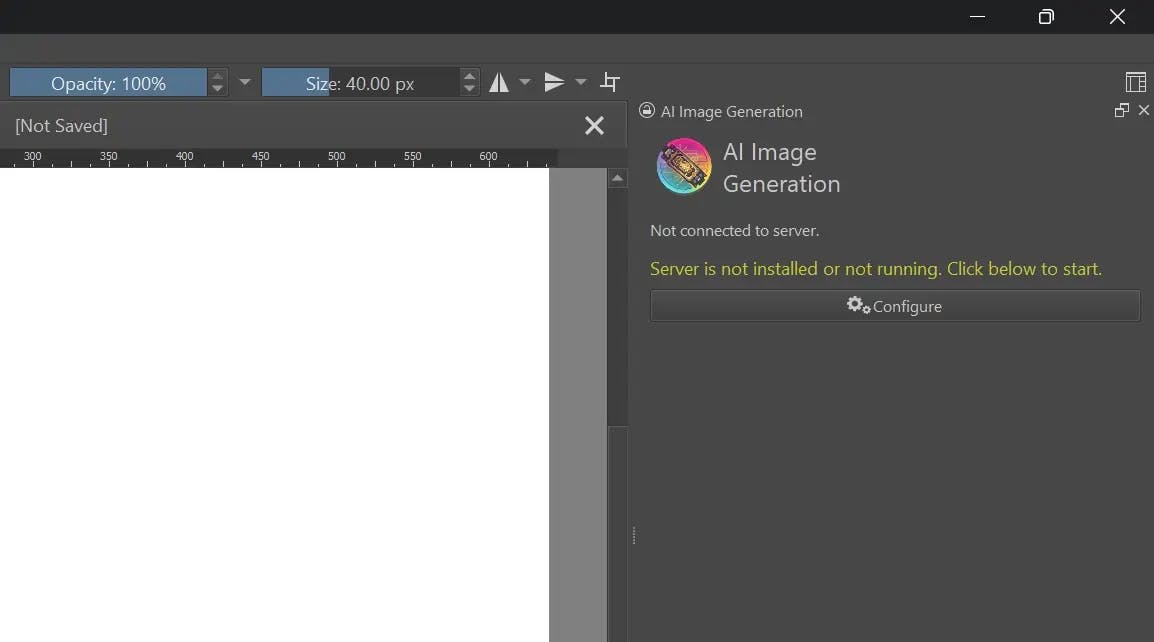
To generate images you also need a backend server. Click Configure to choose between multiple options:
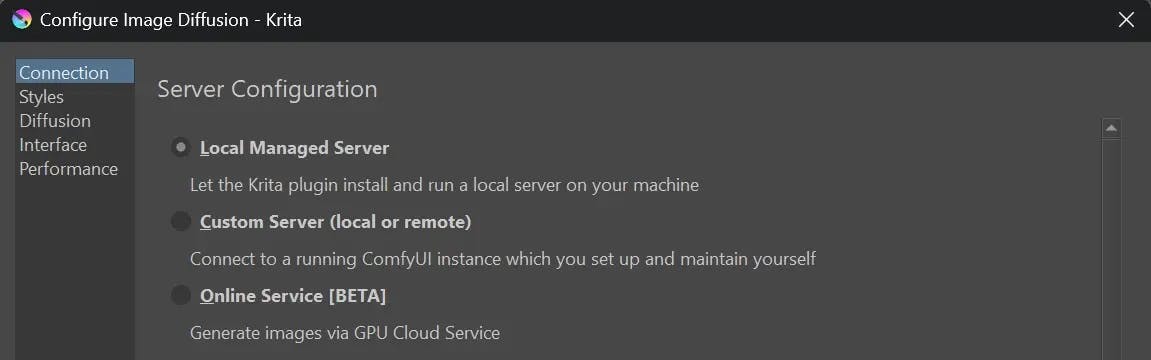
- Local Managed ServerThe Plugin will download and install the server on your system.
Requires a powerful GPU! Continue reading below for details. - Online ServiceCreate an account and generate images on cloud GPU workers.
This requires no installation or hardware on your end. Pricing and TermsCurrently experimental! Only a limited number of images can be generated. - Custom ServerThe Plugin can connect to an existing ComfyUI server, either local or remote.
Read about required custom nodes and models here. This is the most flexible option, but requires some effort and technical knowledge.If you choose this option, it is your responsibility to install and run the server. Instructions and tutorials for ComfyUI can be found online.
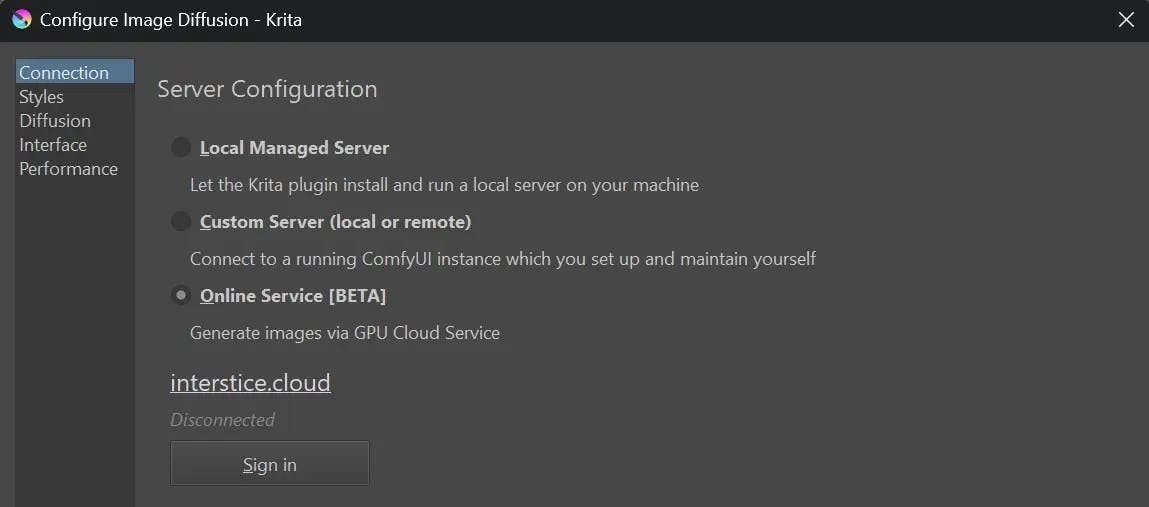
6.Connect to Online Service (Optional)
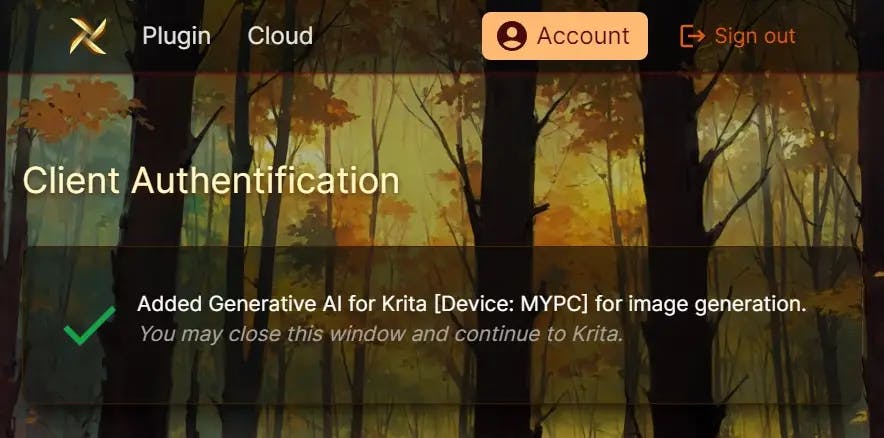
Press the Sign in button. This should open your browser, where you need to log in, or sign up for an account.
Once done, you should see the confirmation screen and can start generating images!
Local Server Installation
These steps are only required if you selected Local Managed Server as the backend.
1.Hardware requirements
| NVIDIA | GTX 1060 6GB or better. You may encounter issues and limitations on older cards. |
| AMD | 8GB VRAM or more. Slow with limited feature set. Custom install required for Linux. |
| Apple | M1/M2 via MPS (community support). |
| CPU | Works, but is very slow. |
Please make sure you are using an up-to-date GPU driver!
2.Operating System
Windows, Linux or macOS
Python with venv must be installed. Recommended version: 3.11 or 3.10
This is usually available via package manager, eg. apt install python3-venv
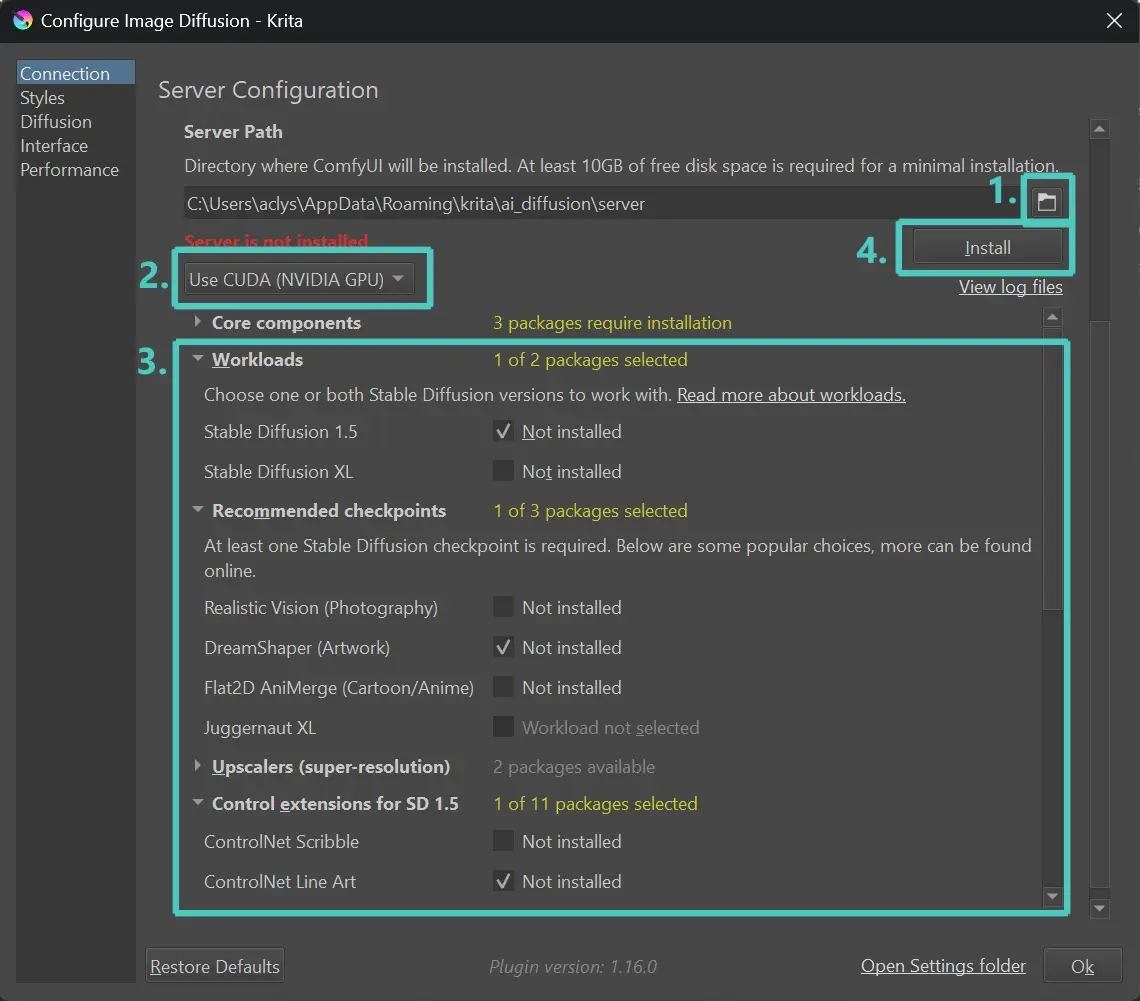
3.Installation
- Choose a path where to install.
Keep in mind AI models can be very large, 10GB is a minimum, 50GB+ not unusual depending on optional packages. - Choose a backend. CUDA only works for NVIDIA GPUs. Use DirectML for AMD.
Make sure to do this before you install! - Select packages. You need at least one workload and one checkpoint.
Everything else is optional and will considerably increase download size. You can come back later and add packages at any time. - Click install!
4.Troubleshooting
If you cannot find a solution to your problem, open a new Issue.